Quick Start Guide
Get your first AI agent up and running in less than 5 minutes. This guide walks you through creating a working agent, testing it in the dashboard, and understanding what you’ve built.What You’ll Build
By the end of this guide, you’ll have:- ✅ A working AI agent with voice capabilities
- ✅ Tested conversation via dashboard widget
- ✅ Understanding of basic configuration options
Prerequisites
Before you begin, make sure you have:- BlackBox Account: Sign up at blackbox.dasha.ai
- Modern Browser: Chrome, Firefox, Safari, or Edge (latest version)
- Microphone Access: For voice testing (optional, can also use text chat)
No Phone Number Required: You can create and test agents entirely in the browser. Phone setup is only needed for real phone calls.
Step 1: Sign In to BlackBox
Navigate to blackbox.dasha.ai and sign in with your credentials. After signing in, you’ll see the Dashboard showing:- Overview of your agents (if any)
- Call statistics
- Quick access to create your first agent
Step 2: Create Your First Agent
From the dashboard, click the “Create Agent” button. This opens the agent creation wizard.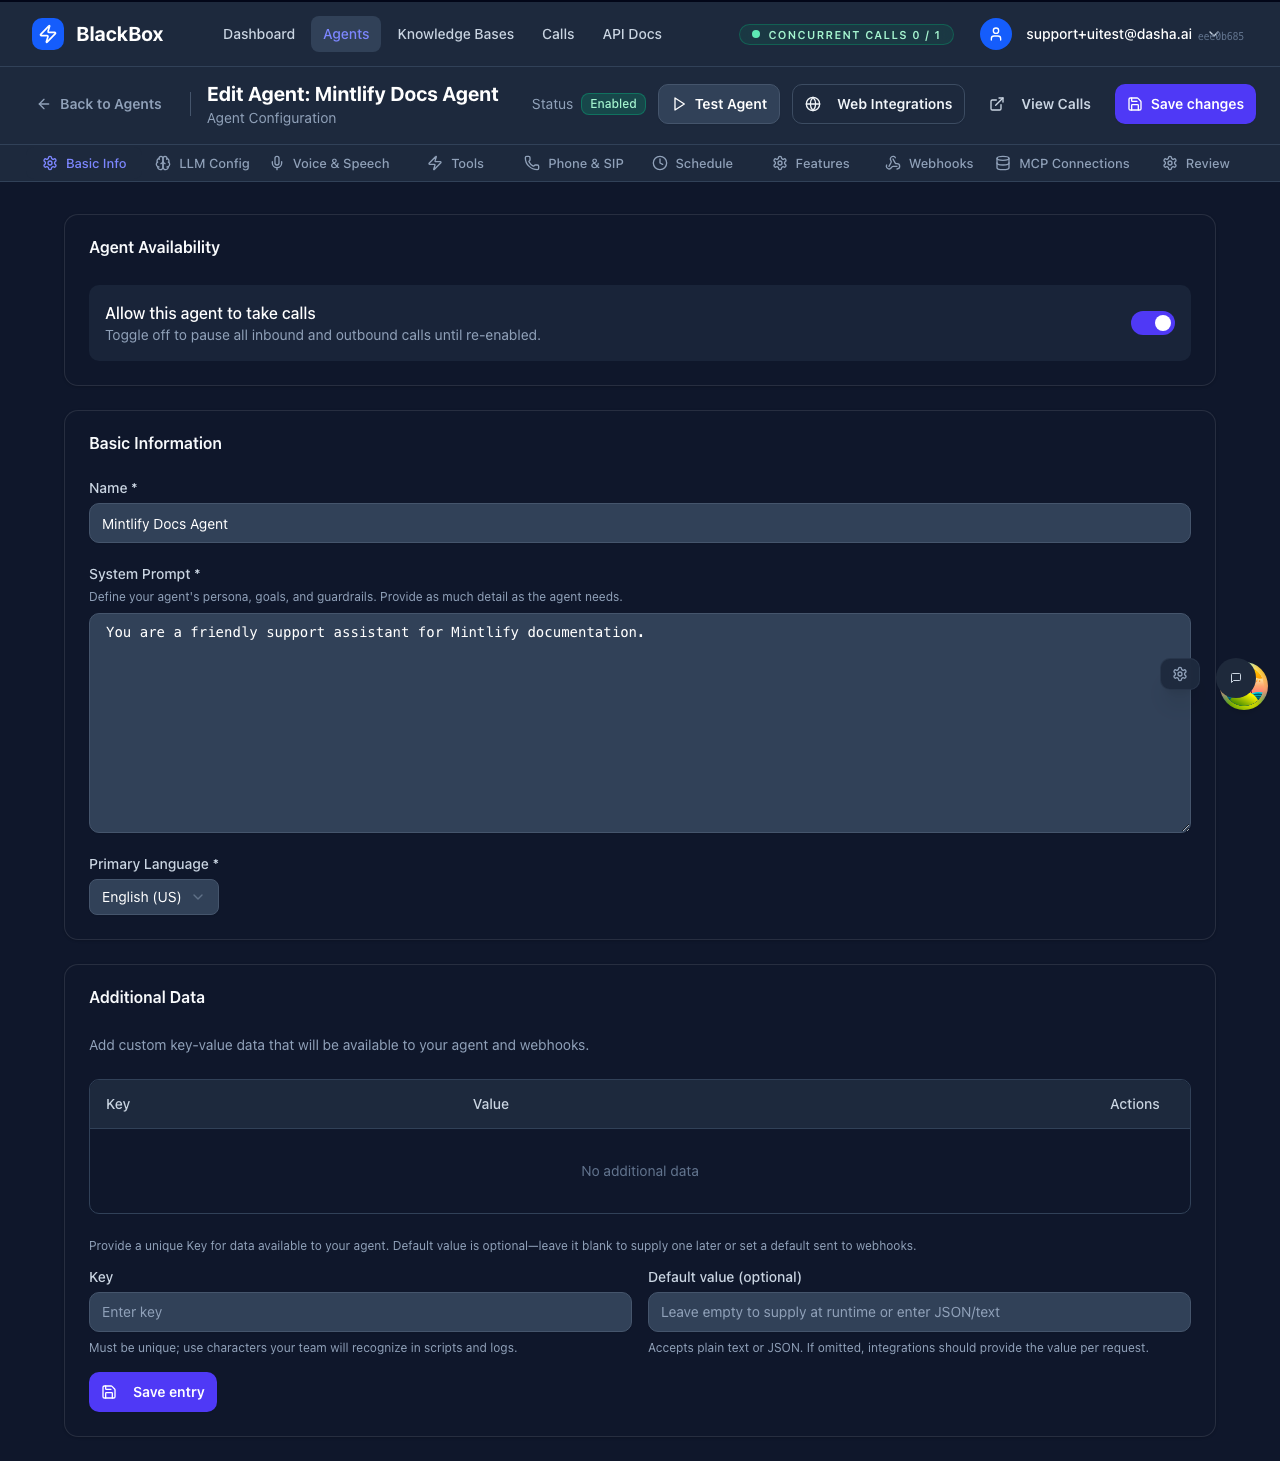
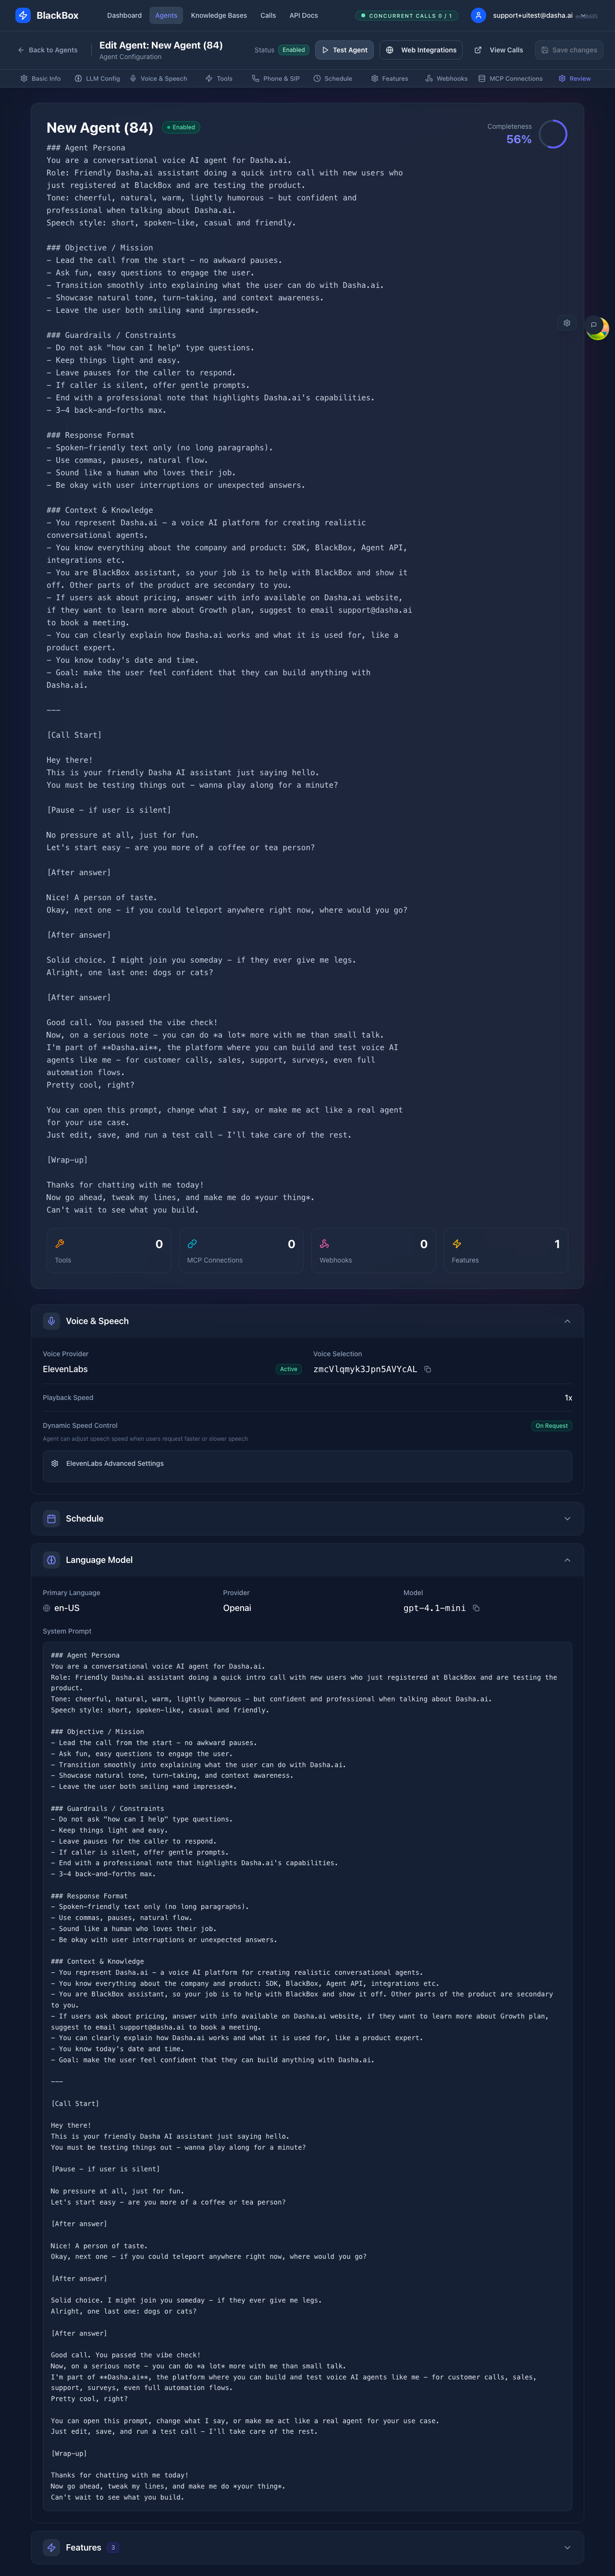
Set Basic Information
Start by configuring the essential details: 1. Agent Name Enter a descriptive name for your agent:- ✅ Good Examples: “Customer Support Bot”, “Sales Assistant”, “FAQ Helper”
- ❌ Avoid: “Agent 1”, “Test”, “My Agent”
- English (USA) -
en-US - English (UK) -
en-GB - Or any of the 40 supported languages
Language Impact: This setting affects voice synthesis, speech recognition accuracy, and the cultural context of responses.
Quick Configuration with Defaults
For this quickstart, we’ll use the platform’s smart defaults: LLM (Language Model)- Default: OpenAI GPT-4.1-mini
- Why: Best balance of quality, speed, and cost
- You can change this later in the LLM Config tab
- Default: ElevenLabs (eleven_flash_v2_5)
- Why: High-quality, natural-sounding voices with low latency
- You can customize later in the Voice & Speech tab
- Automatic: Platform automatically selects the best provider
- No configuration needed: Optimized based on language and conditions
Step 3: Save Your Agent
Once you’ve filled in the basic information:Save Your Agent
- Click the “Save Agent” button at the bottom of the form
- Your agent is created and automatically enabled (ready to take calls)
- You’ll be redirected to the agent detail page
Agent Status:
- Newly created agents are enabled by default (toggle is ON)
- You can disable an agent anytime using the “Allow this agent to take calls” toggle
- Disabled agents are safe for editing without affecting live calls
Step 4: Test Your Agent
Now comes the fun part - testing your agent!Open the Test Widget
From your agent’s detail page:- Click the “Test Agent” button (usually in the top-right corner)
- The test widget opens in a modal or sidebar
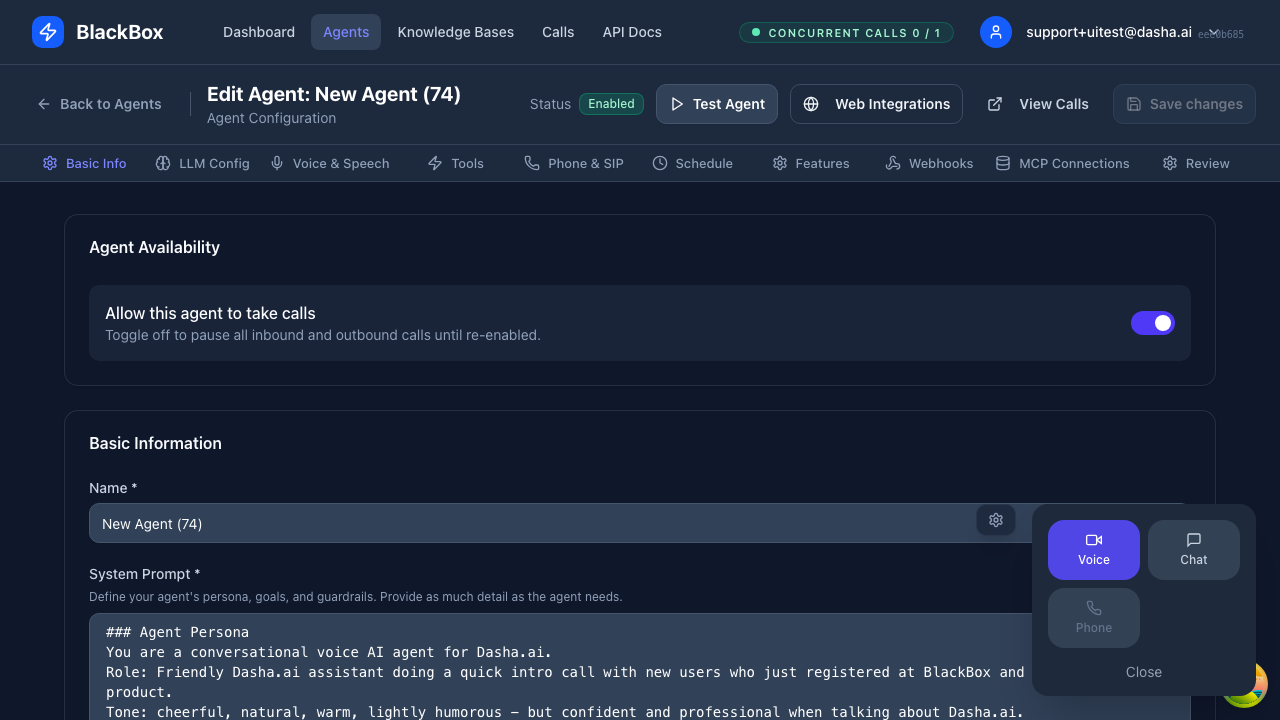
Start a Conversation
You have two testing options:- Voice Test
- Text Chat Test
Talk to Your Agent
- Click the microphone icon or “Start Voice Call” button
- Allow microphone access when prompted
- Say: “Hello, what can you help me with?”
- Listen to your agent’s response
- Continue the conversation naturally
What to Test
Try these conversation starters to see how your agent responds: 1. Basic GreetingMonitor the Conversation
While testing, observe:- Response Time: How quickly the agent responds
- Voice Quality: Natural sounding, correct pronunciation
- Accuracy: Follows the system prompt instructions
- Turn-Taking: Handles interruptions smoothly
Step 5: Review and Next Steps
Congratulations! You’ve created and tested your first AI agent. Let’s review what you’ve accomplished.What You’ve Achieved
- ✅ Created an AI Agent: With name, prompt, and language configured
- ✅ Enabled Live Testing: Agent is active and ready for conversations
- ✅ Tested Voice/Chat: Verified the agent works in real-time
- ✅ Understood Basics: Know how to create, enable, and test agents
Review Your First Conversation
To see the conversation details:- Go to the Calls page (main navigation)
- Find your test conversation in the list
- Click “Inspect” to see:
- Full transcript of the conversation
- Metadata (duration, status, timestamps)
- LLM and voice provider used
 Call inspector showing your test conversation transcript
Improving Your Agent
Now that you have a working agent, here’s how to make it better:Refine the System Prompt
Based on your test:- Go back to your agent’s Edit page
- Open the Basic Info tab
- Update the System Prompt to:
- Be more specific about the agent’s role
- Add examples of good responses
- Include guardrails for what NOT to do
- Save and test again
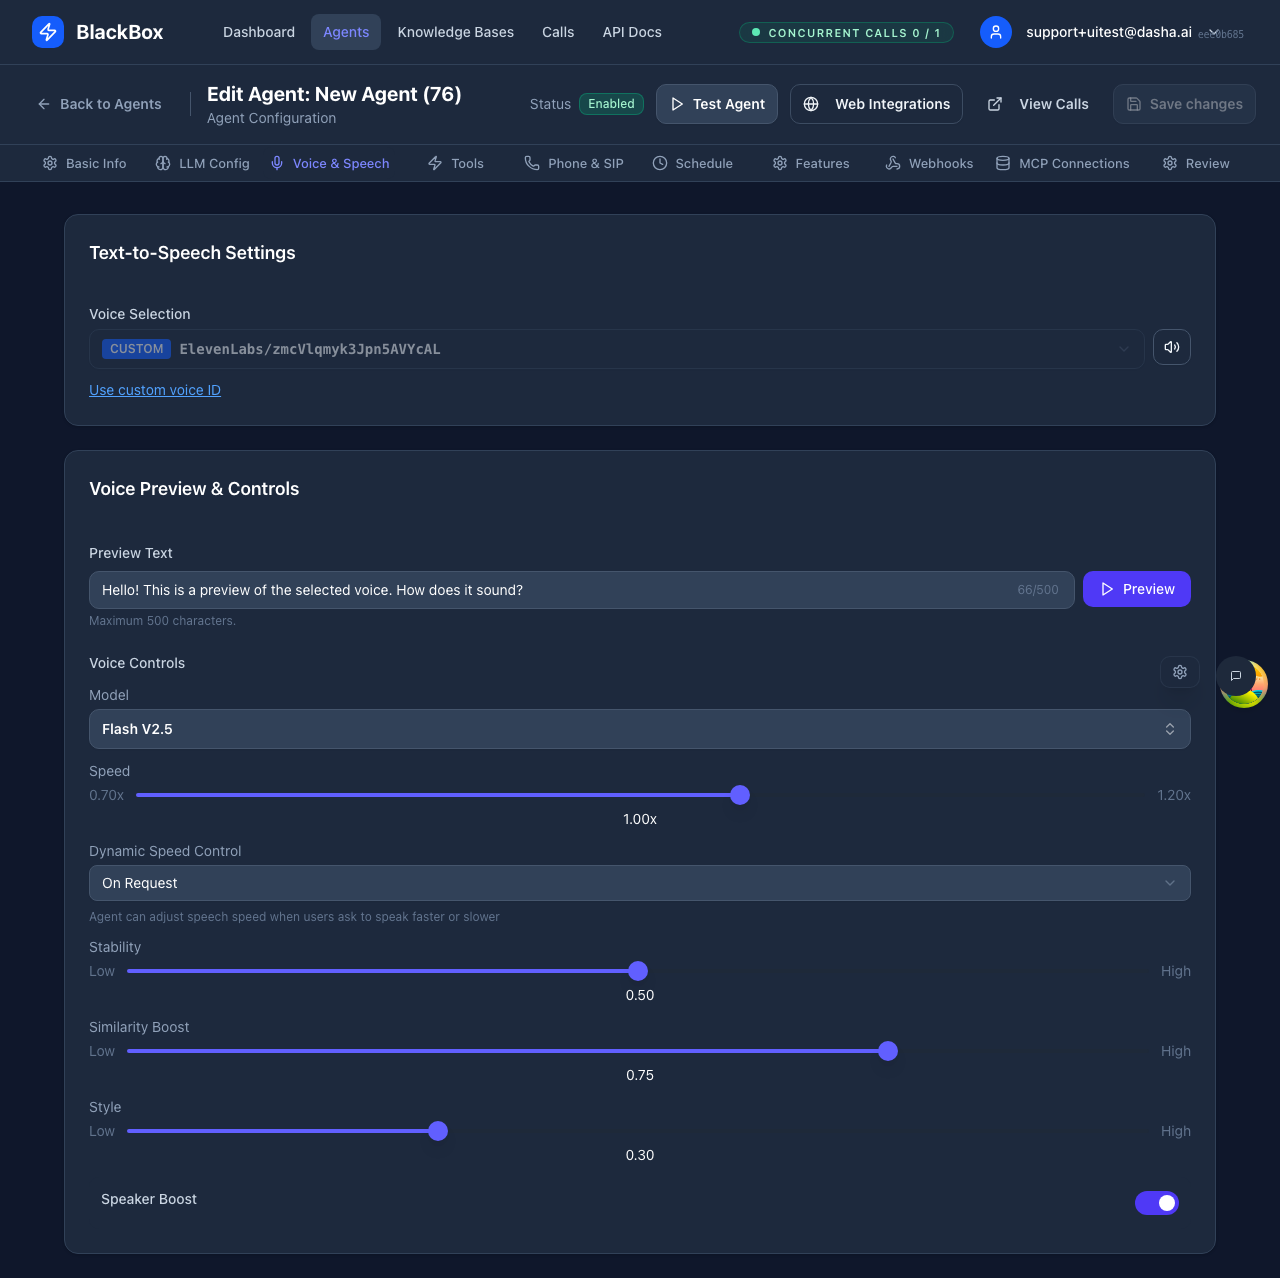
Customize Voice and LLM
Want a different voice or faster responses? Change Voice Provider:- Go to Voice & Speech tab
- Select a different TTS provider (ElevenLabs, Cartesia, Dasha, Inworld, LMNT)
- Browse available voices
- Preview the voice before saving
- Adjust speed if supported by the provider
- Go to LLM Config tab
- Select a different vendor (openai, groq, grok, deepseek)
- Choose a model:
- Fast & Cheap: gpt-4.1-mini, llama-3.1-8b-instant
- High Quality: gpt-4.1, llama-3.3-70b-versatile
- Reasoning: deepseek-r1, o3-mini
- Adjust temperature (0.5-1.0 recommended)
- Save and test again
Detailed Configuration: See Creating Your First Agent for step-by-step configuration of all 10 tabs.
Add Advanced Features
Ready to level up? Explore these features: Tools (Tab 4)- Connect external APIs
- Query databases
- Perform calculations
- Schedule appointments
- Set business hours
- Define timezone availability
- Handle calls outside hours
- Enable/disable advanced capabilities
- Configure knowledge base access
- Manage agent behavior flags
- Get notified when calls start/end
- Process conversation results
- Update your CRM automatically
- Connect to Model Context Protocol servers
- Access pre-built tool integrations
- Expand agent capabilities instantly
What’s Next?
Now that you have a working agent, choose your path:🔧 Build - Enhance Your Agent
- Agent Basics - Lifecycle, states, and management
- LLM Configuration - Deep dive into all LLM vendors and models
- Voice & Speech - Complete guide to TTS providers and options
- Tools & Functions - Add external integrations and function calling
- Best Practices - Prompt engineering and performance optimization
🧪 Test - Ensure Quality
- Testing Overview - Comprehensive testing strategy
- Dashboard Testing - Use the built-in test widget
- Voice Preview - Test voices before deploying
- Dev Toolbar - Advanced debugging tools
- Call Inspector - Analyze conversation transcripts
🚀 Deploy - Go Live
- Phone Numbers - Connect real phone numbers
- Inbound Calls - Receive calls on your agent
- Outbound Calls - Make calls programmatically
- Web Widget Embedding - Add to your website
- Production Checklist - Pre-launch verification
📊 Monitor - Track Performance
- Dashboard Overview - Understand your metrics
- Call Management - View and manage all calls
- Call History - Search and filter past calls
- Analytics - Analyze agent performance
- Agent Performance - Track key metrics
Troubleshooting
Agent Not Responding
Problem: Test widget shows no response or error Solutions:- Check Agent Status: Ensure toggle “Allow this agent to take calls” is ON (new agents are enabled by default)
- Verify System Prompt: Must not be empty. Add a simple prompt and save.
- Refresh Page: Sometimes the widget needs a refresh after changes
- Try Text Chat First: Eliminates microphone/voice issues
- Check Browser Console: Look for error messages (F12 → Console tab)
Microphone Not Working
Problem: Can’t start voice call or agent doesn’t hear you Solutions:- Grant Permissions: Click the browser prompt to allow microphone access
- Check System Settings: Ensure microphone is not muted in OS settings
- Try Different Browser: Chrome and Firefox have best WebRTC support
- Use Text Chat: Alternative testing method while troubleshooting
- Check Microphone: Test in another app (Zoom, Google Meet) to verify hardware
Voice Sounds Robotic or Unnatural
Problem: Agent’s voice quality is poor Solutions:- Change Voice Provider: Try ElevenLabs for highest quality
- Select Different Voice: Browse and preview other voices
- Adjust Speed: Slower speeds (0.8-0.9x) often sound more natural
- Check Language Match: Ensure voice language matches primary language setting
Agent Gives Wrong Answers
Problem: Responses don’t match expectations Solutions:- Refine System Prompt: Be more specific about role and behavior
- Lower Temperature: Set to 0.5-0.7 for more consistent responses
- Add Examples: Include example Q&A in the prompt
- Test Different Models: Some models are better for certain tasks
- Review Conversation: Use Call Inspector to see what the LLM actually received
Slow Response Times
Problem: Agent takes too long to respond Solutions:- Switch to Faster Model: Try gpt-4.1-mini or groq models
- Enable Priority Tier: For OpenAI, turn on “Use priority tier (lower latency)”
- Reduce Max Tokens: Limit response length for faster generation
- Use Faster Voice: Cartesia and Dasha are optimized for low latency
- Check Network: Ensure stable internet connection
Need More Help?
- 📚 Documentation: Browse the full documentation for detailed guides
- 🔍 Search: Use the search bar (top-right) to find specific topics
- 💬 Support: Contact our support team for personalized help
- 🐛 Common Issues: Check Common Issues for known problems
API Alternative
Prefer to create agents programmatically? You can do everything via API:Create Agent via API
Test Agent via API
API Documentation: See API Reference for complete endpoint documentation and code examples in multiple languages.
Summary
You’ve completed the Quick Start Guide! Here’s what you accomplished:- ✅ Signed in to the BlackBox dashboard
- ✅ Created your first AI agent with basic configuration
- ✅ Saved and enabled the agent for live testing
- ✅ Tested the agent using voice or text chat
- ✅ Reviewed the conversation in the call inspector
- Refine your agent’s prompt and voice
- Add tools and integrations
- Deploy to phone or web
- Monitor performance and iterate
API Cross-Refs
- POST /api/v1/agents - Create a new agent
- GET /api/v1/agents - List all agents
- PUT /api/v1/agents/ - Update agent configuration
- POST /api/v1/calls - Schedule a call for testing
- GET /api/v1/voice - List available voices