Creating Your First Agent
This guide walks you through the editor tabs and the essential settings to get your first agent working quickly.Overview
Step 1: Basic Information
Start by configuring your agent’s fundamental settings.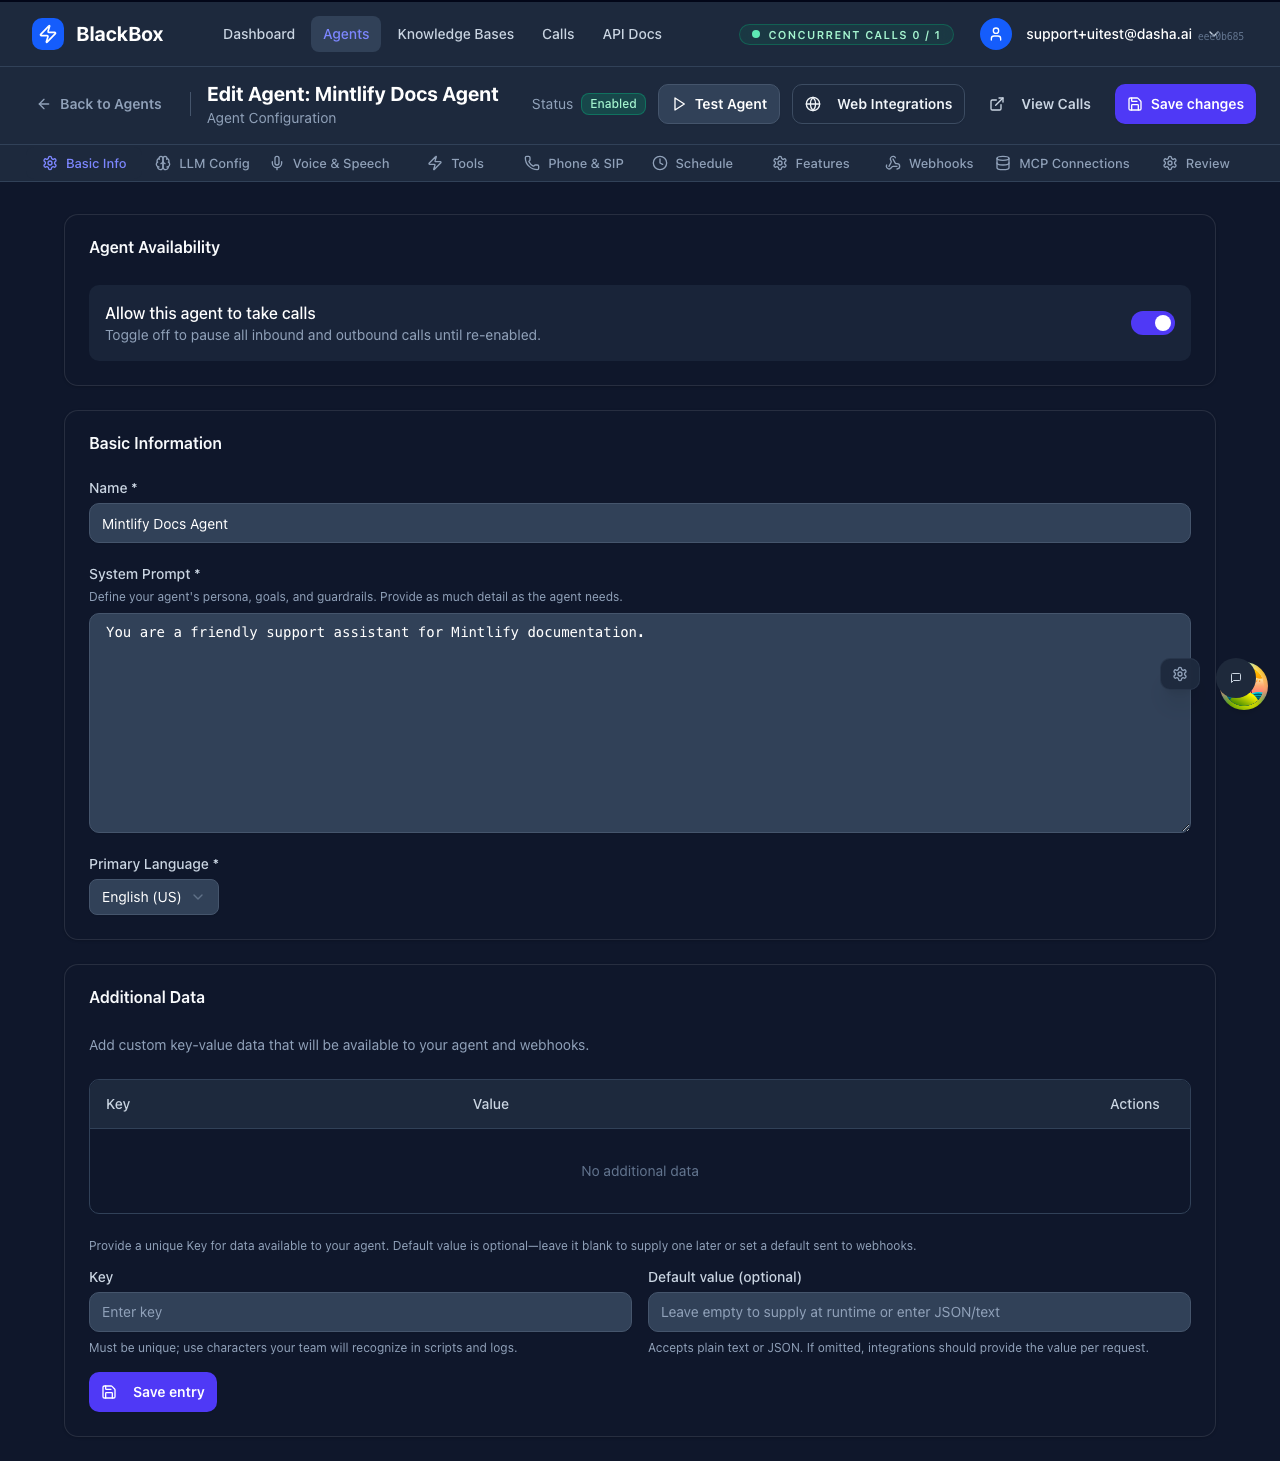
Agent Name
Choose a descriptive name that clearly identifies your agent’s purpose:- ✅ Good: “Customer Support Bot”, “Sales Qualification Agent”
- ❌ Avoid: “Agent 1”, “Test Bot”, “My Agent”
Primary Language
Select the language your agent will primarily use for conversations. This affects:- Voice synthesis language
- Speech recognition accuracy
- Cultural context for responses
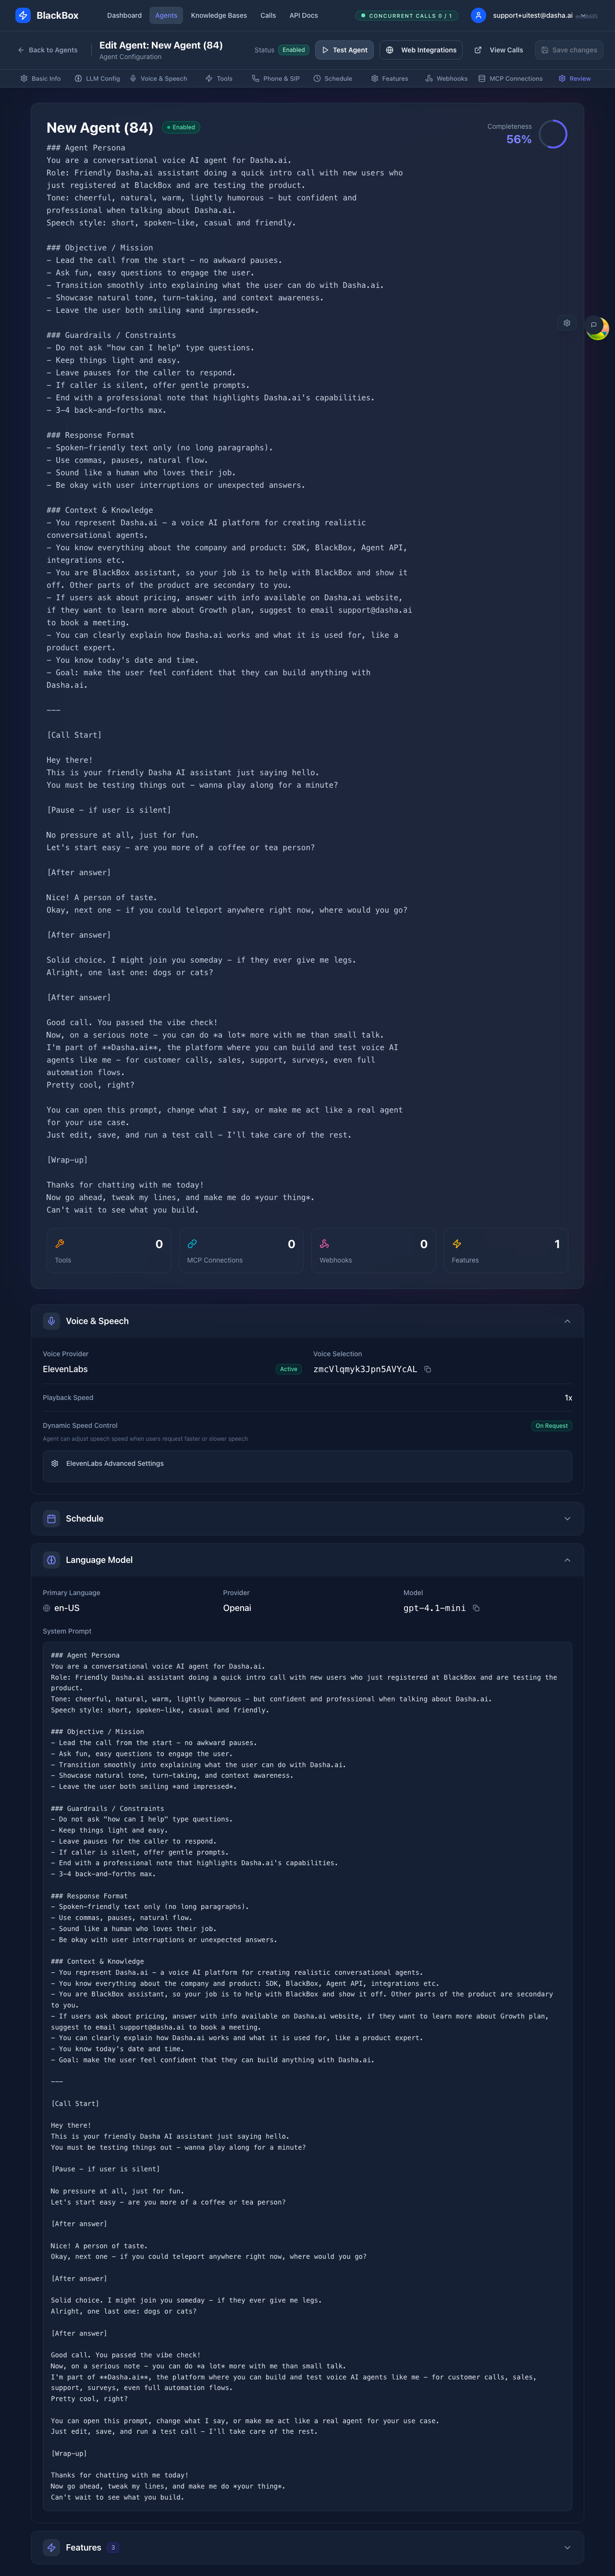
System Prompt
This is the most important setting - it defines your agent’s personality and behavior.- Customer Support Example
- Sales Qualification Example
Step 2: LLM Configuration
Configure the language model that powers your agent’s intelligence.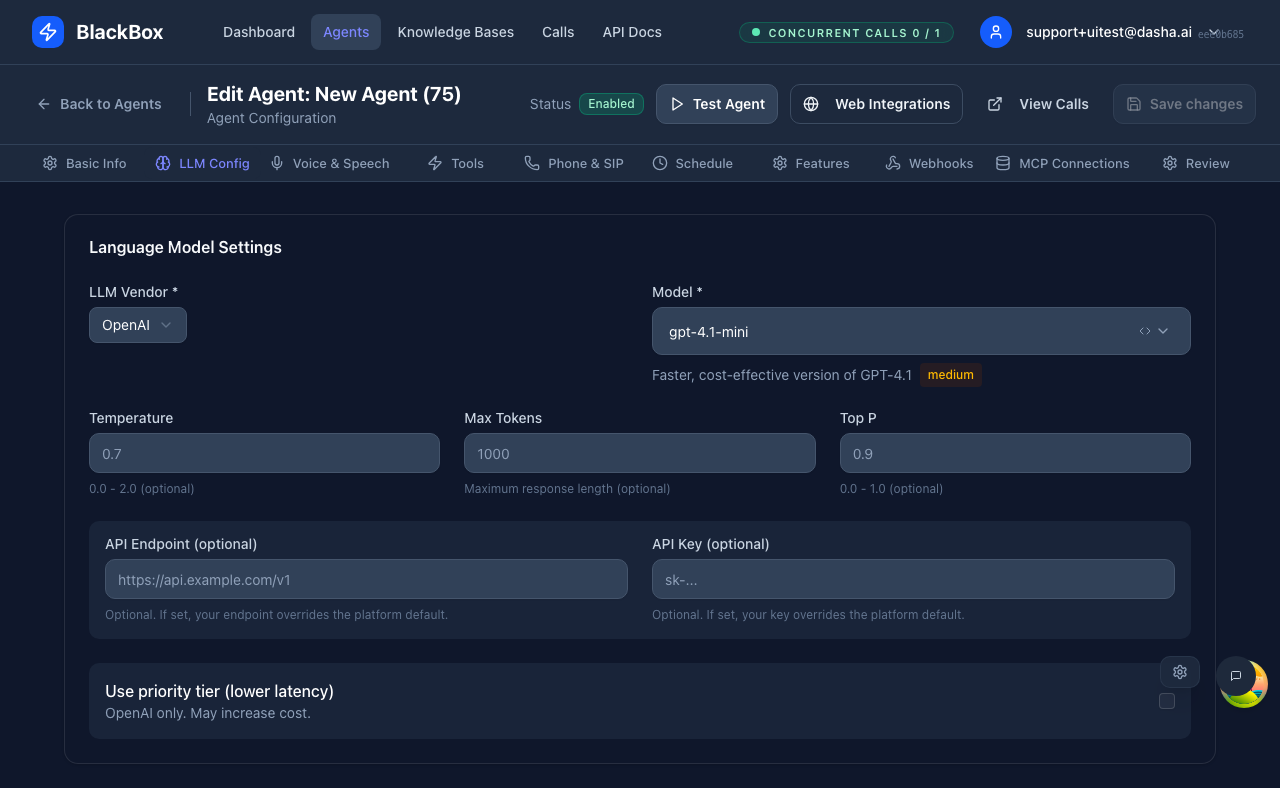
Vendor Selection
Choose from the following GA providers:- openai — OpenAI models (GPT-4, GPT-4.1, etc.)
- groq — Groq’s high-speed inference
- grok — xAI’s Grok models
- deepseek — DeepSeek models
- customCompatible — Custom OpenAI-compatible endpoints
Model Parameters
Fine-tune your model’s behavior with these parameters: Temperature (0.0 - 2.0)- Controls response randomness
- Lower (0.0-0.5): More focused, deterministic responses
- Medium (0.5-1.0): Balanced creativity and consistency
- Higher (1.0-2.0): More creative, varied responses
- Recommended: 0.7 for most conversational agents
- Controls diversity via nucleus sampling
- Lower values: More focused word choices
- Higher values: More diverse vocabulary
- Recommended: 0.9 or leave default
- Maximum response length
- Higher values allow longer responses
- Consider latency and cost tradeoffs
- Recommended: 150-300 for conversational agents
OpenAI-Specific Options
When using OpenAI, you can enable: Use priority tier (lower latency)- Sets
vendorSpecificOptions.service_tier = 'priority' - Reduces response latency for time-sensitive applications
- May incur additional costs
- Default: Off
Custom Compatible Providers
ForcustomCompatible, you must provide:
- API Endpoint: Your custom OpenAI-compatible endpoint URL
- API Key: Authentication key for your endpoint
Step 3: Voice & Speech
Configure how your agent sounds to create the right experience for your users.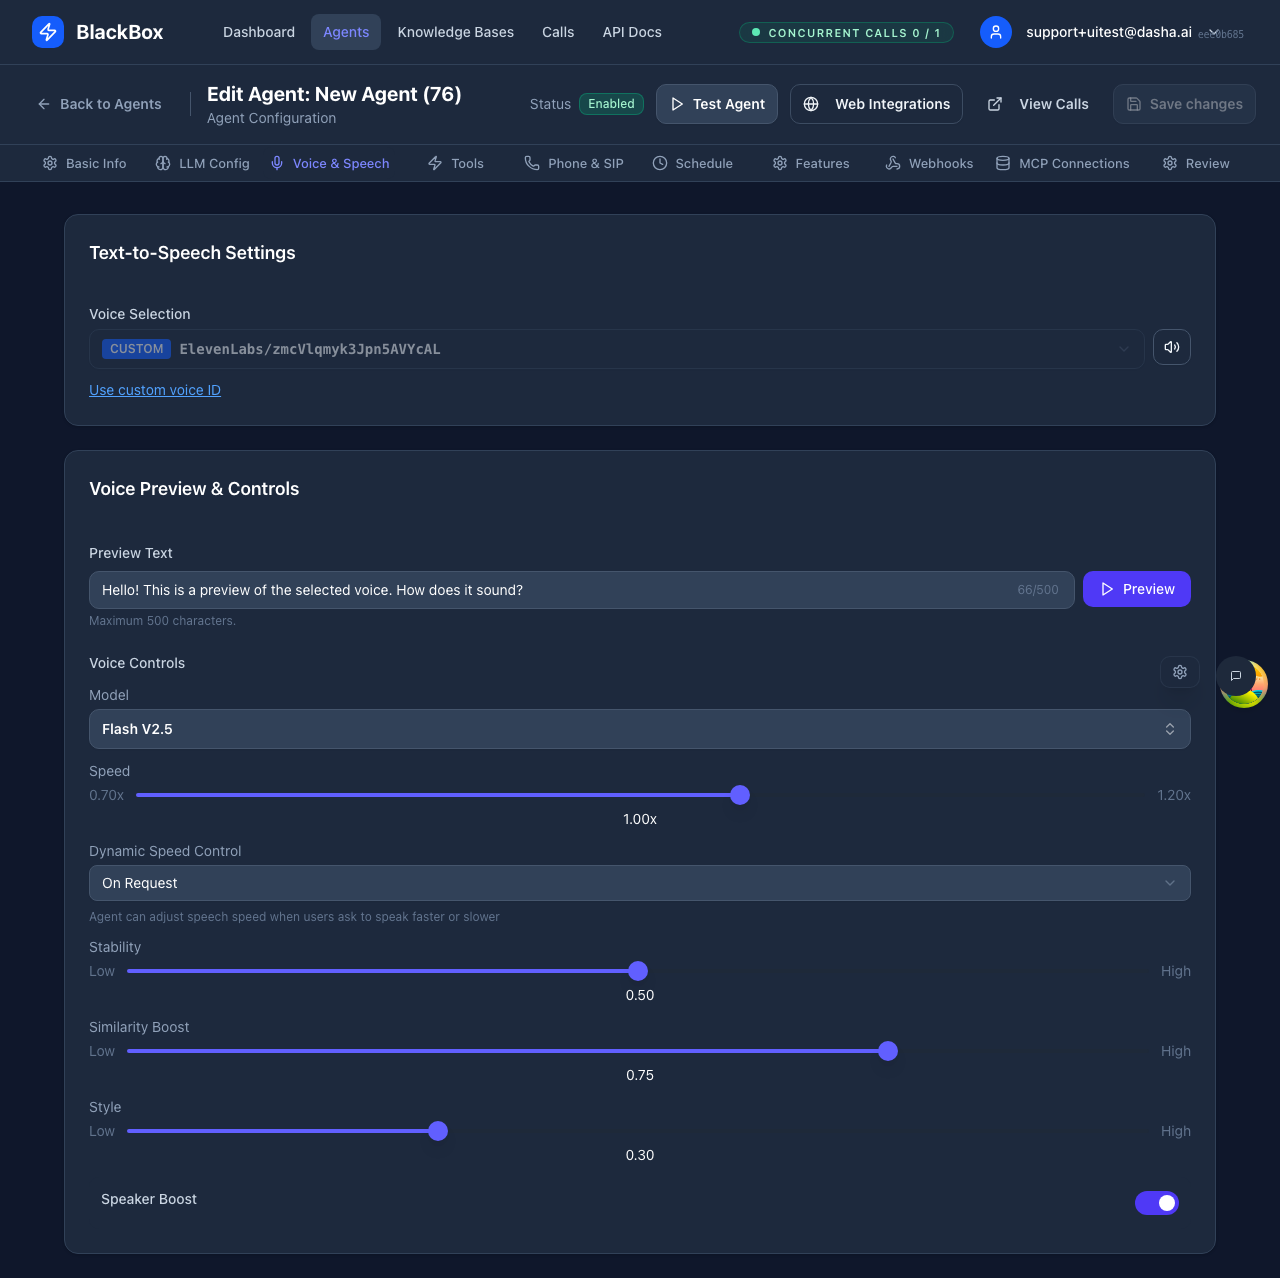
TTS Provider Selection
Choose from these GA text-to-speech providers:- ElevenLabs — High-quality, natural-sounding voices with extensive customization
- Cartesia — Fast, low-latency voices with emotion support
- Dasha — Optimized for conversational AI with wide speed range
- Inworld — Character voices with pitch and temperature controls
- LMNT — Consistent, reliable voice synthesis
Voice Selection
Each provider offers a variety of voices. You can:- Browse available voices by name
- Preview voices before selecting
- Filter by language and accent
- Add custom voice IDs not in the default list
Speed Adjustment
Speed support varies by provider:- ElevenLabs: 0.7× to 1.2×
- Cartesia: 0× to 2.0× (0 = fastest)
- Dasha: 0.25× to 4.0× (widest range)
- Inworld: 0.8× to 1.5×
- LMNT: Fixed speed (1.0×)
ASR (Speech Recognition)
For detailed voice configuration options, see Voice & Speech.Step 4: Tools & Functions
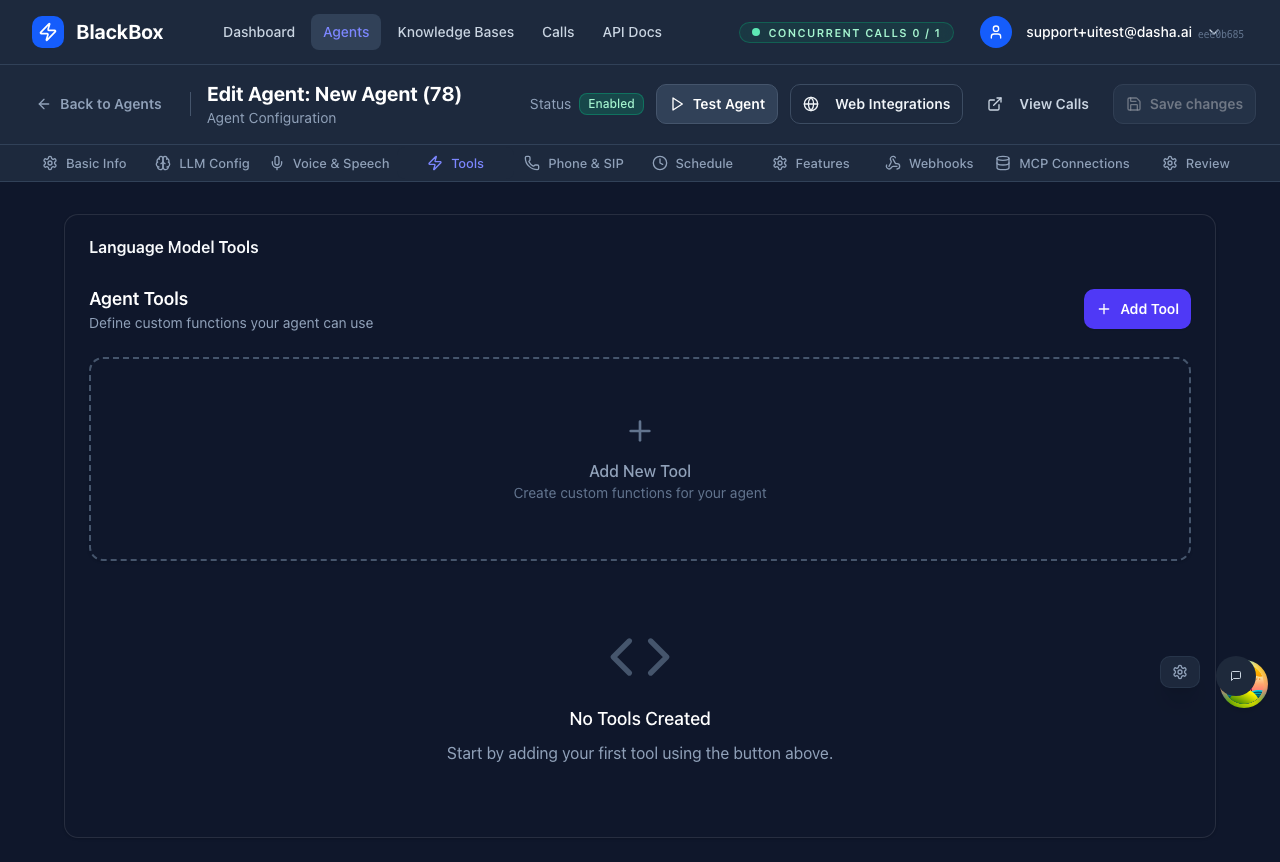
- Query external APIs
- Look up customer data
- Perform calculations
- Schedule appointments
- Transfer calls
- Name: Unique identifier for the function
- Description: What the function does (helps the LLM decide when to call it)
- Parameters: Input schema (JSON Schema format)
- Implementation: Your backend endpoint that executes the function
Step 5: Schedule & Availability

- Set hours per weekday (Monday through Sunday)
- Multiple time blocks per day supported
- Example: Mon-Fri 9:00-12:00, 13:00-18:00
- Defaults to your browser’s timezone
- Important for scheduling outbound calls
- Affects call routing and availability
- Rejected automatically
- Sent to voicemail (if configured)
- Queued for next available time
Step 6: Features

- Allow users to request different languages mid-call
- Agent adapts voice and responses to match
- Requires multilingual LLM and voice support
- Background noise handling (ambient noise)
- Transfer capabilities (cold, warm, HTTP)
- Talk-first greetings
- Maximum call duration limits
- IVR detection
- Post-call analysis
Step 7: Webhooks
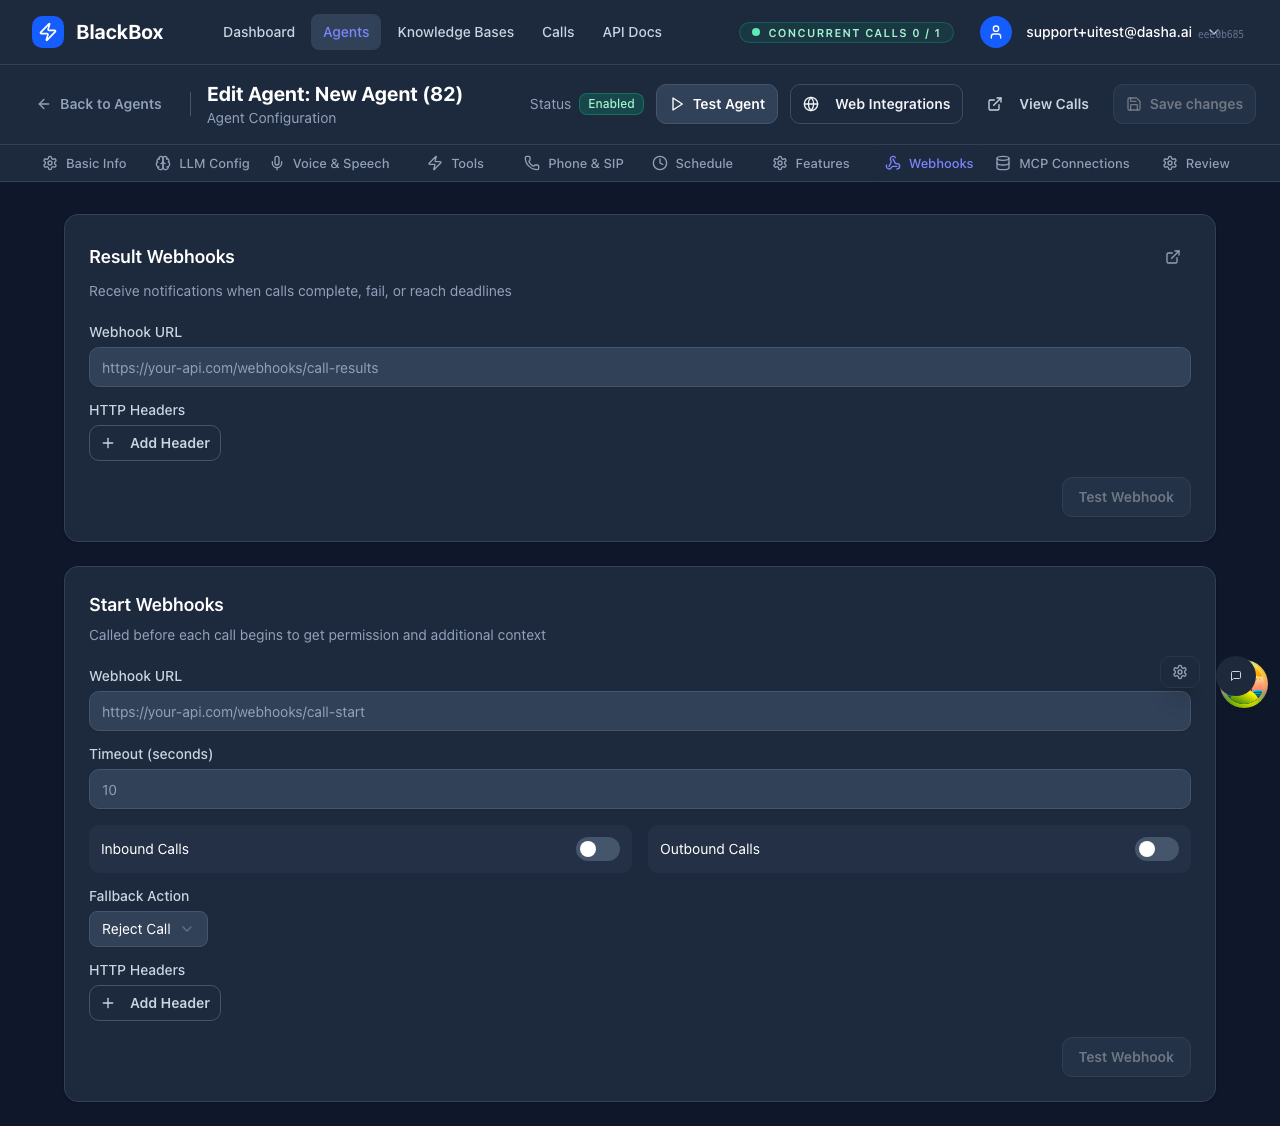
- Called when a conversation begins
- Receive caller information and context
- Return dynamic data for the call
- Called when a conversation ends
- Receive full transcript and metadata
- Process outcomes and update your systems
Step 8: MCP Connections
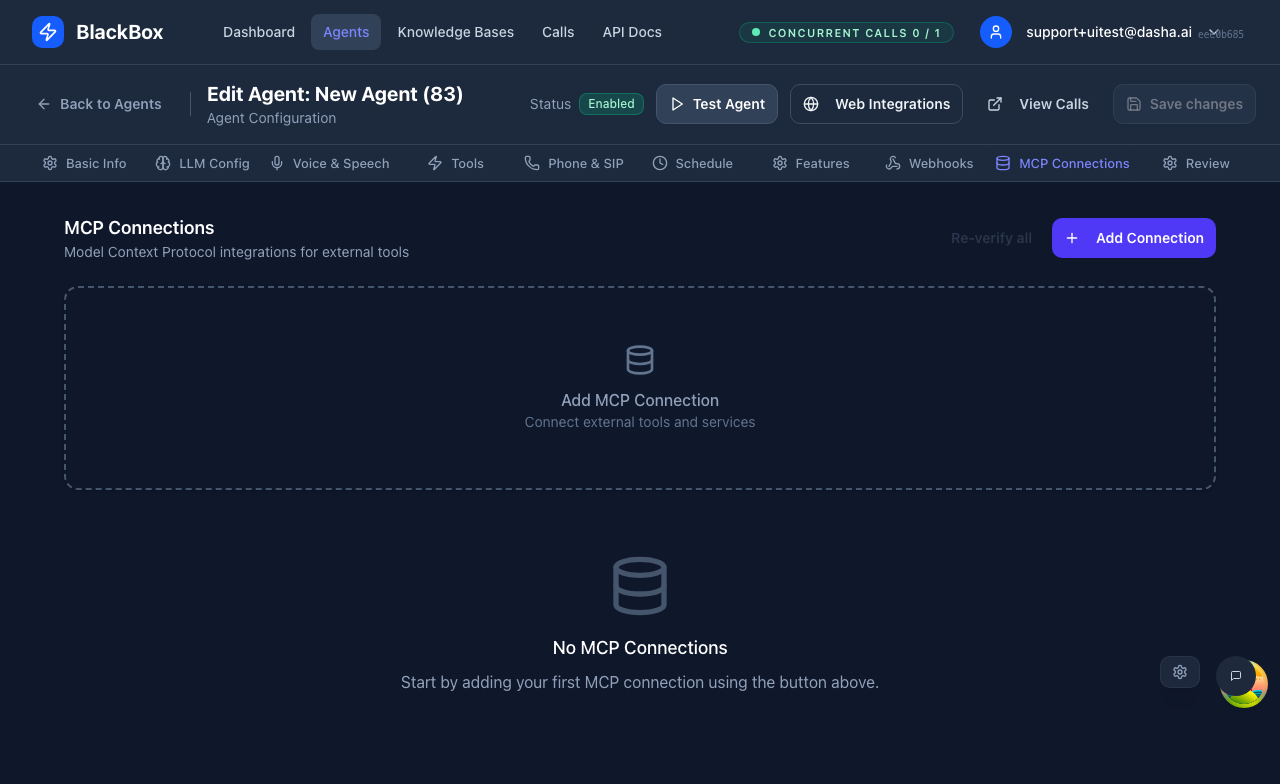
- Standard protocol for connecting AI agents to data sources and tools
- Pre-built integrations for popular services
- Community-maintained server ecosystem
- Access external data sources
- Use pre-built tool sets
- Maintain context across sessions
- Simplify complex integrations
Step 9: Phone & SIP
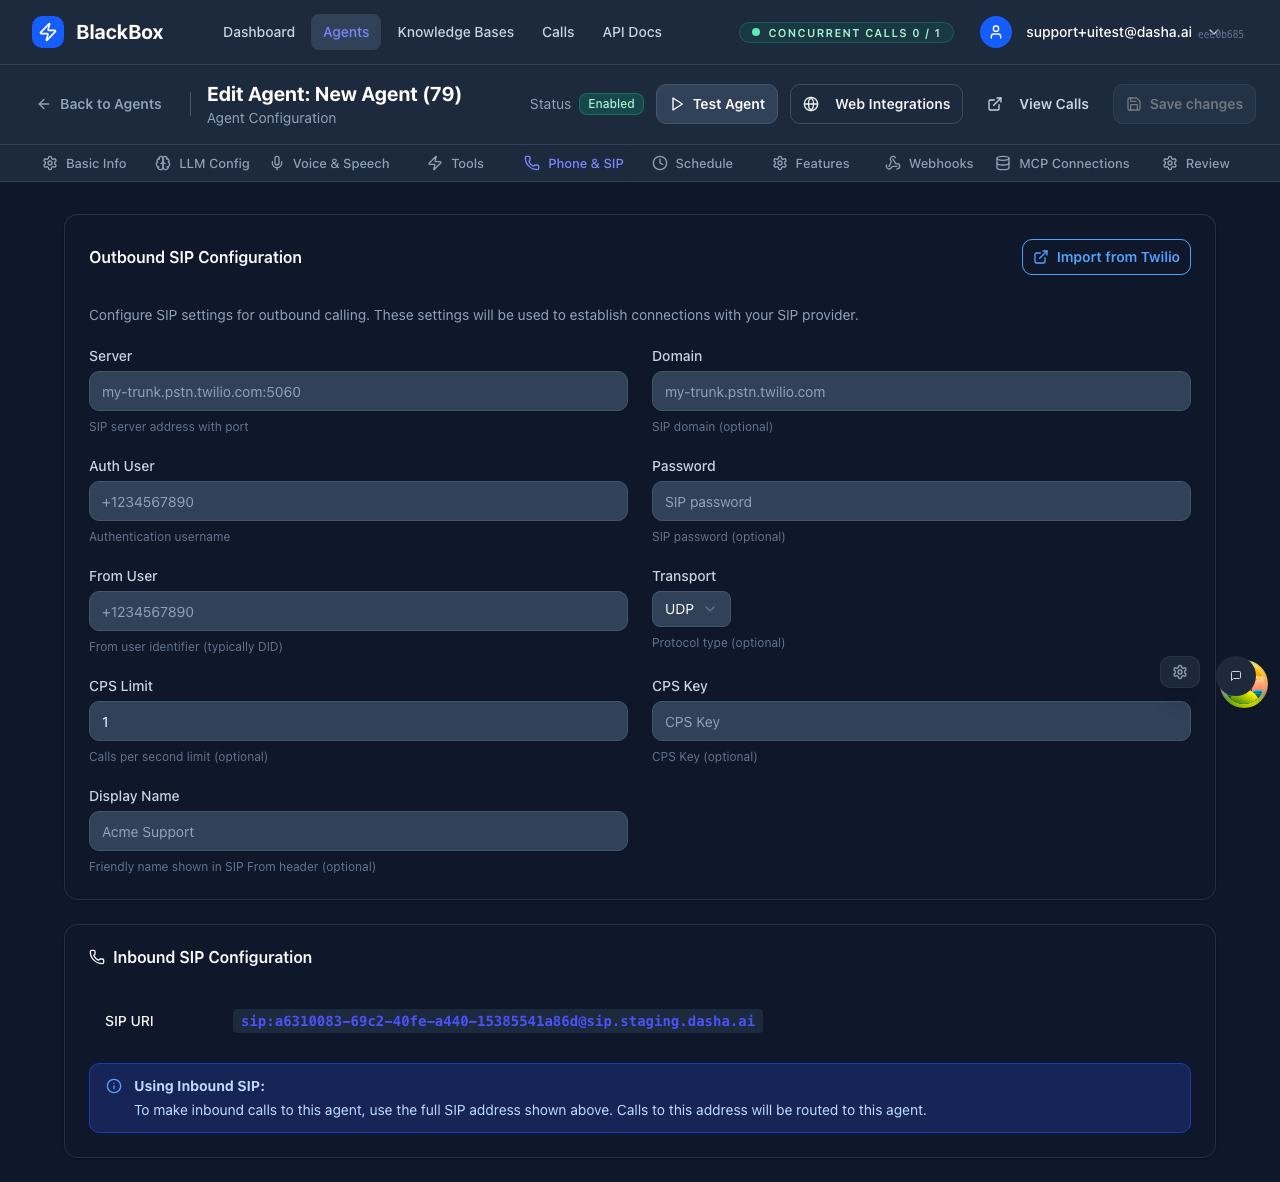
- Only needed for actual phone calls
- Not required for dashboard testing
- Skip this for web widget deployments
- Phone numbers for inbound calls
- SIP settings for your telephony provider
- Call routing rules
- Twilio integration (if using Twilio)
Step 10: Review & Finalize
- ✓ Agent name is descriptive and meaningful
- ✓ System prompt is clear and specific
- ✓ LLM provider and model selected
- ✓ Voice provider and voice chosen
- ✓ Required tools configured (if any)
- ✓ Business hours set correctly
- ✓ Webhooks configured (if needed)
- All required fields are filled
- Settings match your requirements
- No validation errors present
Save and Test
-
Save Your Agent
- Click “Save Agent” to create your agent
- Your agent starts in “Draft” status
-
Enable Your Agent
- Toggle the “Enabled” switch
- Your agent is now active
-
Test Your Agent
- Use the dashboard test widget
- Try different conversation scenarios
- Verify voice quality and responses
Common Configuration Mistakes
Next Steps
Now that you’ve created your first agent:- Test Thoroughly: Use the Testing Overview guide
- Configure Advanced Features: Explore Advanced Features
- Deploy Your Agent: Learn about Phone Numbers and Web Widgets
Troubleshooting
Agent Not Responding
- Check if agent is enabled
- Verify system prompt is not empty
- Test with simple questions first
Voice Issues
- Ensure voice provider is configured
- Test voice preview before saving
- Check language settings match
Poor Conversation Quality
- Refine your system prompt
- Adjust temperature settings
- Test with different conversation types
Need Help? Check our Troubleshooting Guide for detailed solutions to common problems.